How to Install Squid Proxy Server to Your Shell™
Introduction
Squid is a proxy service used to filter web traffic that is capable of improving web server performance caching resources. Squid mediates traffic between a desktop computer and the internet and redirects inbound client requests to a data store for faster performance. It supports HTTP, FTP, TLS, SSL, and HTTPS traffic.
We will show you how to install and set up Squid proxy server on your Shell.
Prerequisites
Before we can open ports to additional traffic, you must purchase a $1 dedicated IP address.
Follow the tutorial below:
How to Purchase and Active a Dedicated IP address for your Shell
Installation
To install squid, enter the following into the terminal prompt:
sudo apt install squid To check that the squid service is running, enter the following:
sudo systemctl status squidHow to Configure IP-Based Authentication
Squid allows you to restrict internet access to clients in many different ways. This is how to restrict the internet to only those with the appropriate IP addresses.
We must edit the default Squid configuration file:
Add the lines below at the beginning of the configuration file:
acl client1 src [enter the client IP address here]
acl client2 src [enter the client IP address here]
http_access allow client1 client2
To add more clients just copy the line and number the clients appropriately. Save and close the file when you are finished.
To apply changes, restart Squid:
sudo systemctl restart squidWe have now configured the server so that only computers with the IP addresses that you have included can access the internet.
User-Based Authentication
It is also possible to authenticate based on username and password. We must install Apache utils in order to achieve this.
To install the Apache utils package enter:
sudo apt install apache2-utils -yNext, create a user with this command:
htpasswd /etc/squid/passwd client1You will receive a prompt to set your password.
You may verify all created users by viewing the password configuration file, enter:
cat /etc/squid/passwdNow open the default Squid configuration file:
sudo nano /etc/squid/squid.confAdd the following lines at the beginning of the file. (Remember, the lines that we added in the previous section were for IP-based Authentication.)
auth_param basic program /usr/lib/squid3/basic_ncsa_auth /etc/squid/passwd
acl ncsa_users proxy_auth REQUIRED
http_access allow ncsa_users
Save and close the configuration file, then restart Squid with:
sudo systemctl restart squidUsers will now need to enter their credentials to access the internet.
How to Anonymize Traffic with Squid
In order to anonymize web traffic and mask client IP addresses, we must add some rules to Squid.
Edit the default Squid configuration file:
sudo nano /etc/squid/squid.confAdd the lines below at the beginning of the file:
forwarded_for off
request_header_access Allow allow all
request_header_access Authorization allow all
request_header_access WWW-Authenticate allow all
request_header_access Proxy-Authorization allow all
request_header_access Proxy-Authenticate allow all
request_header_access Cache-Control allow all
request_header_access Content-Encoding allow all
request_header_access Content-Length allow all
request_header_access Content-Type allow all
request_header_access Date allow all
request_header_access Expires allow all
request_header_access Host allow all
request_header_access If-Modified-Since allow all
request_header_access Last-Modified allow all
request_header_access Location allow all
request_header_access Pragma allow all
request_header_access Accept allow all
request_header_access Accept-Charset allow all
request_header_access Accept-Encoding allow all
request_header_access Accept-Language allow all
request_header_access Content-Language allow all
request_header_access Mime-Version allow all
request_header_access Retry-After allow all
request_header_access Title allow all
request_header_access Connection allow all
request_header_access Proxy-Connection allow all
request_header_access User-Agent allow all
request_header_access Cookie allow all
request_header_access All deny all
Save and close your changes, then restart the Squid service to apply the changes.
sudo systemctl restart squidCheck Squid Proxy
To begin using our proxy server, we must enter the settings into the browser of our client computer.
For this we will be using Mozilla web browser.
Go to the client computer, open Mozilla, and go to Options.
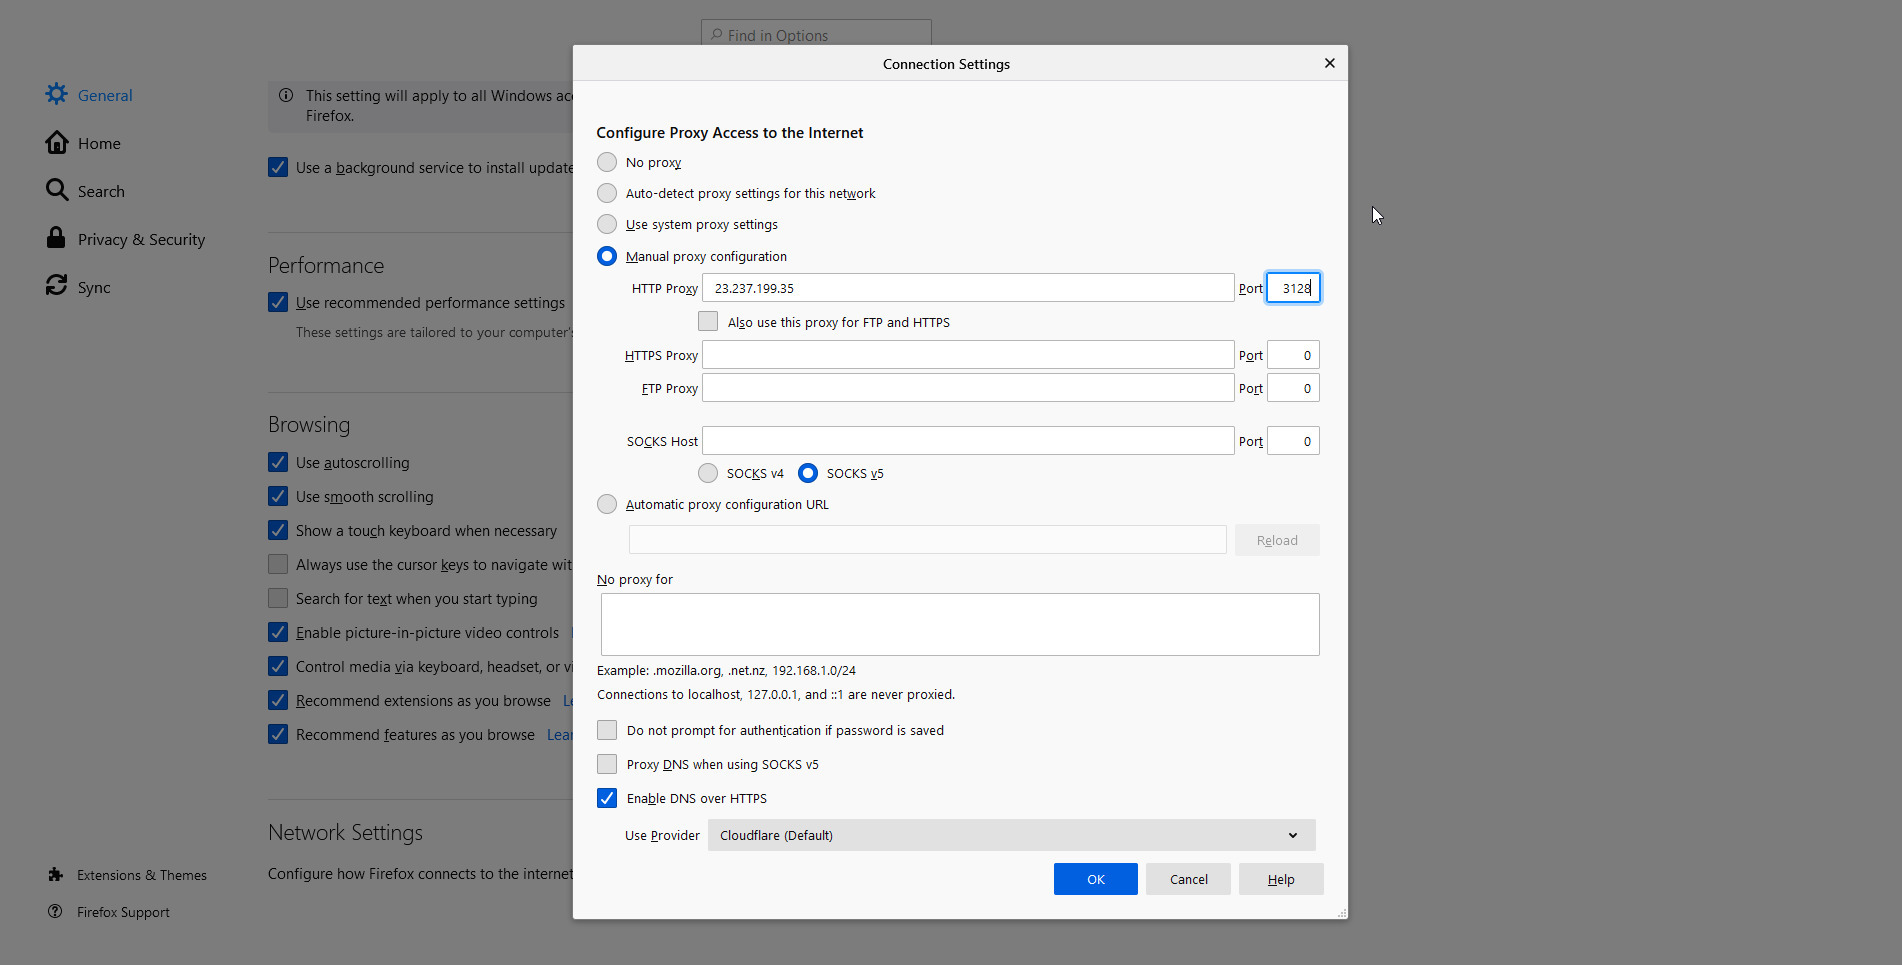
Scroll to the bottom of the page to Network Settings and click Settings.
Select Manual proxy configuration and enter your Squid server IP and port. Select Use this proxy server for all protocols and click OK to save settings.
To verify check your pubic IP by going to https://whatismyipaddress.com/ and enter your authentication credentials.
You should see the IP address of your proxy server and not the IP address of your client.
